How to Roll a Perfect Joint: Easy Tips for Beginners and Pros

No, we aren’t talking about spraining an ankle… Knowing how to roll a perfect joint comes with some quality practice and the right amount of guidance. You should know that we are here for you and with this guide filled with easy tips for beginners and pros, you will know exactly how to roll a perfect joint. Ready? Let’s roll!
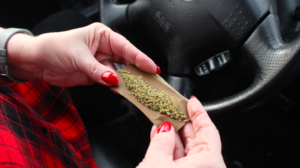
A weed joint, simply put, is a rolled cannabis cigarette, where cannabis flower (often marijuana) is hand-rolled into thin papers (like rolling papers) for smoking. So, these ‘marijuana cigarettes’ have gained a dictionary of different words and definitions for the item. Doobie, Jay, Pearl, Pinner, and Spliff just to name a few common ones.
When you opt to roll a perfect joint yourself, plan on measuring with your heart. Typically, your pre-rolled joints you snag at Shop Smok, are 1 gram of fresh ground cannabis in high-quality rolling papers and crutch (we’ll talk about this later). There are also smaller joints, called Dogwalkers, that typically have around a half gram of flower rolled up and ready to smoke.
If you have been in the cannabis world for long enough, you can agree that a joint and a blunt are two completely different things. To a newbie, it’s good to just know the basics. To put it in the simplest way, joints are like cigarettes, and blunts are like cigars. Mainly because a blunt uses a wrap made from tobacco leaves (exactly like a cigar is).
A blunt also requires more than a gram of ground weed to fill it up. Meaning it’s a good idea to look into blunts if you are constantly rolling up 2-3 joints at a time, or find yourself sharing with friends.
Oh, you like math huh? Then you’ll have fun determining how much THC is in a joint! But, for those who cringe at the word ‘math’, we got you. First, and most importantly, the THC percent of the strain you’re lighting up…
Low-THC strains 5-10% thc
Medium 10-15% thc
High 20%+
Next, determine how much cannabis you’re consuming. Again, a typical joint is around 1 gram of cannabis. Lastly, multiply the cannabis weight in grams by the THC percentage to calculate how much THC is in your joint.
CANNABIS JOINT: 1 gram (1,000 milligrams)
THC%: 15%
TOTAL THC: 1 gram x 15% = 150 milligrams
If you’re just starting out on your journey to learn how to roll a perfect joint, you’ll need to stock up on a few essentials. The following is a quick list, then we will give you some more details on each item.

When choosing rolling papers, it’s worth thinking about factors like burn speed, thickness, and the material they’re made from. These aspects can greatly impact your overall smoking experience. Papers that burn more slowly are perfect for longer sessions, making them great for sharing in a group or for those who enjoy taking their time.
The thickness of the paper matters too—thinner ones burn quicker and are more low-key, while thicker ones last longer and burn more gradually. The material plays a big role as well, influencing both the flavor and how the paper burns, offering a range of options to suit different preferences.
Ever noticed some papers are bright white while others have that natural brown look? That’s the bleached versus unbleached difference. Those white papers have actually been treated with chemicals to get that clean appearance, while the brown ones are just showing off their natural color.
Then there’s the material itself. You’ve got options! The classic wood pulp papers are what most of us started with—they’re traditional and come in various thicknesses depending on your preference. Hemp papers have become the hot fad that’s staying—not only are they more environmentally friendly (always a plus!), but they also offer this clean, subtle taste that doesn’t interfere with the flavor of your flower.
If you’re looking for something super thin and elegant, rice papers might be your thing. They burn incredibly slowly, which means your session lasts longer, and they’re so thin they practically disappear when you’re smoking. Perfect if you really want to taste your flower without much paper influence.
Now let’s go over some of the best rolling paper brands on the market that you can find.
Chances are, you’ve got a pack of these stashed in your glove box right now. For years, Zig-zags have been the trusted choice for rolling papers, especially for those who prefer to avoid specialty smoke shops. You can snag a pack at nearly any corner store or gas station for just a buck or two. The thin, (bleached or unbleached) paper is easy to roll thanks to its horizontal watermarks that provide extra grip. Find all different types of Zig Zag rolling papers here.
Crafted in Spain, these rice papers prioritize top-notch quality and, as their somewhat enthusiastic packaging claims, show a strong commitment to being eco-friendly. One standout feature is the magnetic closure on the packaging, which is a game-changer for those who often end up ruining papers when the box accidentally stays open.
Elements comes from the same folks behind Raw rolling papers, but they’re quite different in design and feel. These papers are ultra-thin and incredibly easy to roll with. When smoked, they don’t add any noticeable flavor and leave behind minimal ash. Get Element rolling papers here.
These are the reigning champions of rolling papers right now. If you’re lighting up with someone who knows how to roll a perfect joint, chances are they’ll whip out a pack of these bad boys. Raw has gained major street cred, partly thanks to their partnership with rapper and well-known weed aficionado Wiz Khalifa, which has helped spread their popularity far and wide.
These brown, hemp-based papers come with a diamond-patterned watermark and a smooth adhesive strip. The hemp paper adds a subtle, earthy undertone to the flavor of the weed that’s absolutely delicious. The airflow through these papers is incredible, making for a smooth and satisfying pull every time. Pick up some RAW rolling papers here.

They also make it easier to hold the joint without burning your fingers and add stability when rolling. While some people mistakenly call them “roaches,” the term “roach” actually refers to the tiny, burnt remnant left after a joint has been smoked.
You can purchase filter tips separately, but many rolling paper packs include perforated strips specifically intended for this purpose. If you’re in a pinch, you can improvise by tearing off a piece of a business card or even using part of the rolling paper packaging to create a makeshift filter.
For something a little fancier, glass or wooden crutches are excellent alternatives to paper filters and are readily available at tobacco shops, head shops, or dispensaries. Feeling inventive? Even a piece of fusilli pasta can double as a creative and functional filter!
Rolling trays are a fantastic tool to enhance your joint-rolling experience, helping you stay organized and keeping all your essentials in one spot. Some trays come with handy compartments to hold items like grinders, rolling papers, concentrates, and stash jars, while others provide a simple flat surface that makes rolling easier and prevents stray cannabis from spilling all over the place.
Before you do any fancy joint rolling techniques, you need to grind up your buds. A grinder makes sure that it breaks up your flower with a consistent texture and size so you can enjoy a smoother and more even burn. But, there are a few different types of weed grinders on the market, and some are way better than others.
These are the most straightforward option. They consist of two sections that fit together. When you twist them, the teeth inside crush the cannabis. The ground-up flower stays in the same compartment where you placed it.

These have an added feature — a second chamber. The top section is where you place your buds, and as you twist, the cannabis gets ground and then falls through holes into the lower compartment. This makes retrieving your freshly ground flower much easier.
These take things up a notch. The top section is for your whole buds, while the second catches the ground cannabis. Below that, there’s a third compartment called a kief catcher. A fine screen separates this section, allowing tiny trichomes (commonly known as “kief”) to fall through over time. You can collect this potent material and sprinkle it into your joints for an extra kick.
Powered by batteries, these grinders make the process nearly effortless. Simply press a button, and the device does all the work for you. They’re perfect for anyone who struggles with manual grinding or needs to prepare larger quantities quickly.
Pro tip: When using larger buds in a grinder, use your fingers to break it up into smaller pieces. You don’t want ANY stems in your grinder, and especially in your joint. Not only can stems clog up your grinder, they can poke holes in you perfectly rolled joint.

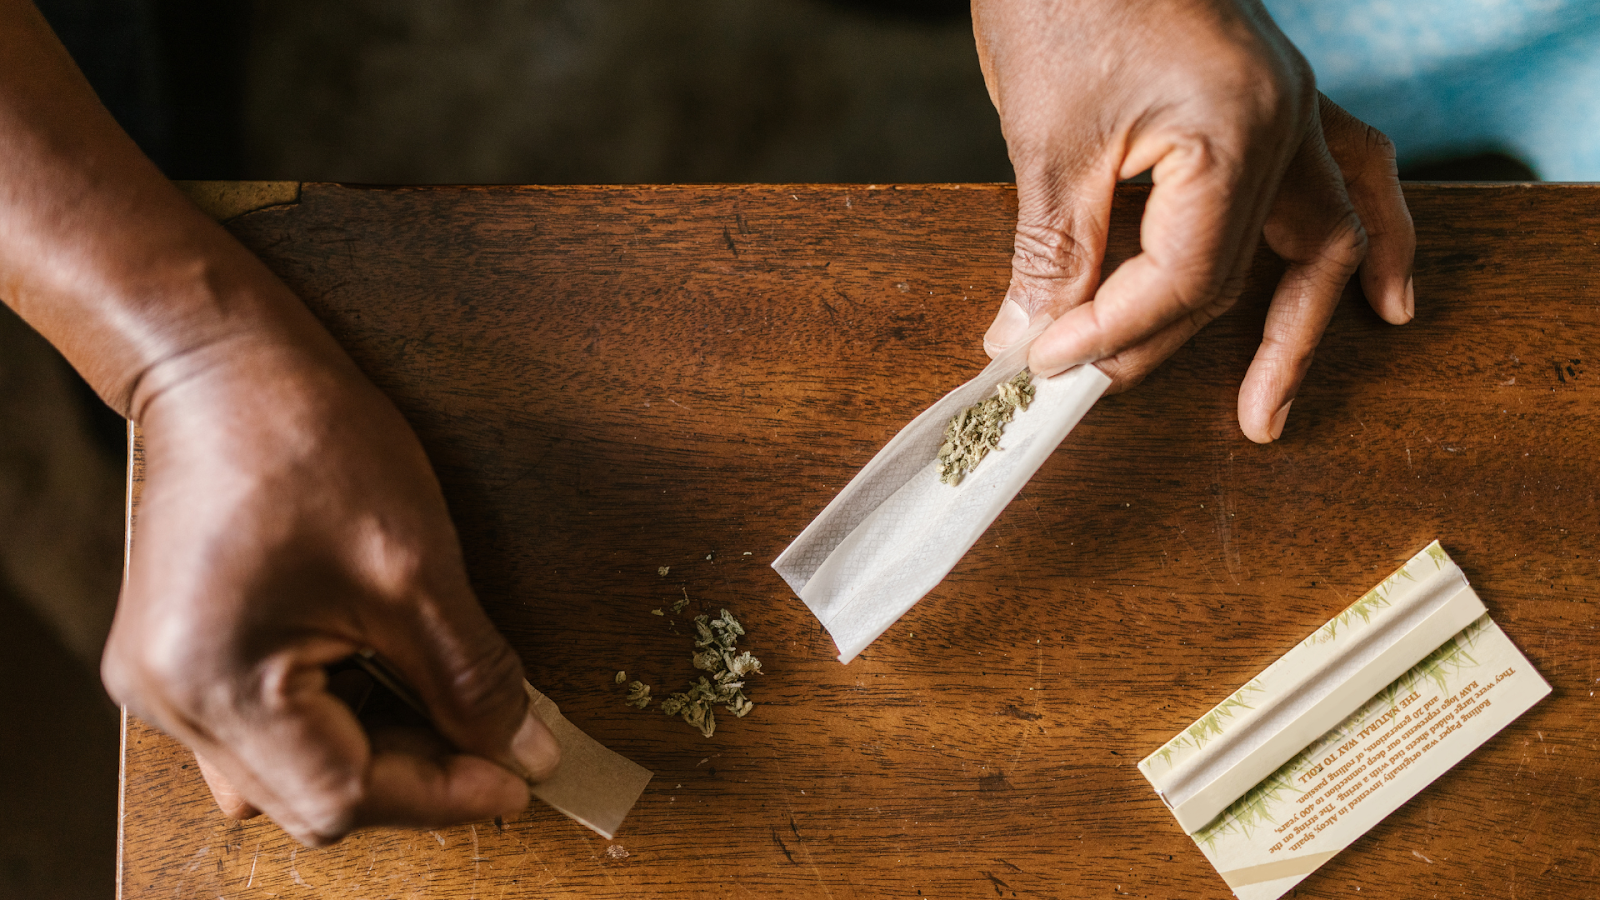
To roll a perfect joint, start by adding a small amount of fresh ground cannabis onto the rolling paper.
Next, fold the paper over your cannabis pile to create a tight seal. Keep the paper and weed in the paper as you roll the joint between your fingers.
Make sure you are applying even pressure so the joint rolls evenly and tightly.

Lastly, your rolling paper has glue on it, a lot like an envelope. Giving a good lick to the glue strip or taking a little droplet of water on your finger to run over the strip. The glue will be activated and will easily adhere together.
Remember, practice makes perfect. It can take you a few tries to crank out an absolute pearl. It does take time and practice.
Here’s a handy trick: If you’re struggling to keep the tip steady, try lifting the loose end of the tip slightly and tucking about half an inch of paper into the roll. Then, gently roll the tip upward to secure it in place. This should help keep the tip from shifting around while also giving the roll some structure, making the rest of the process smoother.
However, if you’re rolling a standard straight joint, this method might leave you with less room for your cannabis and make it a little trickier to pack tightly near the tip. For those aiming to roll a cone-shaped joint, angle the rolling paper slightly as you insert it into the tip for the best results.

First things first, always start with fresh, sticky flower. Trust me, it makes rolling so much easier! That stickiness is your friend—it helps everything hold together nicely and ensures your joint burns evenly throughout. When you’re setting up, pay attention to which way your rolling paper faces. You want that glue strip facing toward you when you begin.
Looking to roll one of those classic cone-shaped joints? Here’s a little secret: it’s all about distribution. Put more flower at the lighting end and gradually use less as you move toward the tip. This naturally creates that tapered cone shape everyone loves.
The real technique comes in the actual rolling motion. Gently tuck the paper under your flower, then use your fingers to roll it back and forth. This packs everything evenly and is the key to getting that smooth, consistent burn.
And don’t forget the finishing touch—always twist the tip when you’re done! It keeps your flower from falling out and makes lighting up so much easier.
Ever notice your joint burning unevenly down one side? That’s called “canoeing,” and it’s super common. The easiest fix is to simply rotate your joint as you smoke—this helps balance out the burn. Better yet, prevent it entirely by making sure you roll tightly and evenly from the start. A little extra attention during rolling saves a lot of frustration later!
If your joint keeps going out (so annoying, right?), there could be a couple of things happening. First, check how you’re lighting it—try rotating the joint while lighting to make sure the flame hits all sides evenly. Still having trouble? Gently blow on the cherry once it’s lit to help it catch properly. That little puff of oxygen can make all the difference.
When your joint is “running” (burning way too quickly), the solution is usually in the rolling technique. Try packing it a bit tighter next time to slow down that burn rate. Also, pay attention to how evenly you’re distributing your flower—uneven packing is often the culprit behind a too-fast burn.
And if you’re coughing through harsh hits, don’t just blame your lungs! The harshness usually comes down to either the quality of your flower or how the joint was rolled. Make sure you’re using good quality bud and take your time rolling to ensure everything’s even. Your throat will thank you for the smoother experience!
Now you’ve officially rolled the perfect joint, now it’s time to fire it up and get to toking! When you first light up, make sure you’re hitting all sides evenly. You want to slowly rotate the joint while holding the flame nearby—not directly on it—until you see a nice, even glow around the entire tip. This little technique is a game-changer for preventing that annoying one-sided burn.
Remember, patience is key here! So many people tend to rush this part, either inhaling way too hard or jamming the joint right into the flame. Take it slow and gentle—your joint isn’t going anywhere, and a careful light sets you up for a much better session.
Here’s a pro tip that changed my smoking life: after you get it lit, give your joint a quick “toast” by gently rotating the edges near (but not in) the flame. It’s like pre-toasting a marshmallow—this extra step creates this beautiful, even burn right from the start.
Notice your joint burning a bit unevenly during your session? No problem! Just lightly tap down the cherry with your finger to compress it slightly. This quick adjustment helps even things out and gets you back to a smooth burn. (Just be careful not to burn yourself!)
And hey, if your joint goes out—which happens to the best of us—don’t stress about it! Simply relight by taking gentle, short puffs while holding the flame to the tip. The key word here is gentle—avoid those deep inhales when relighting unless you want a lungful of harsh smoke!